曙光服务器配置
请勿修改环境变量 ~/.bashrc 内容!
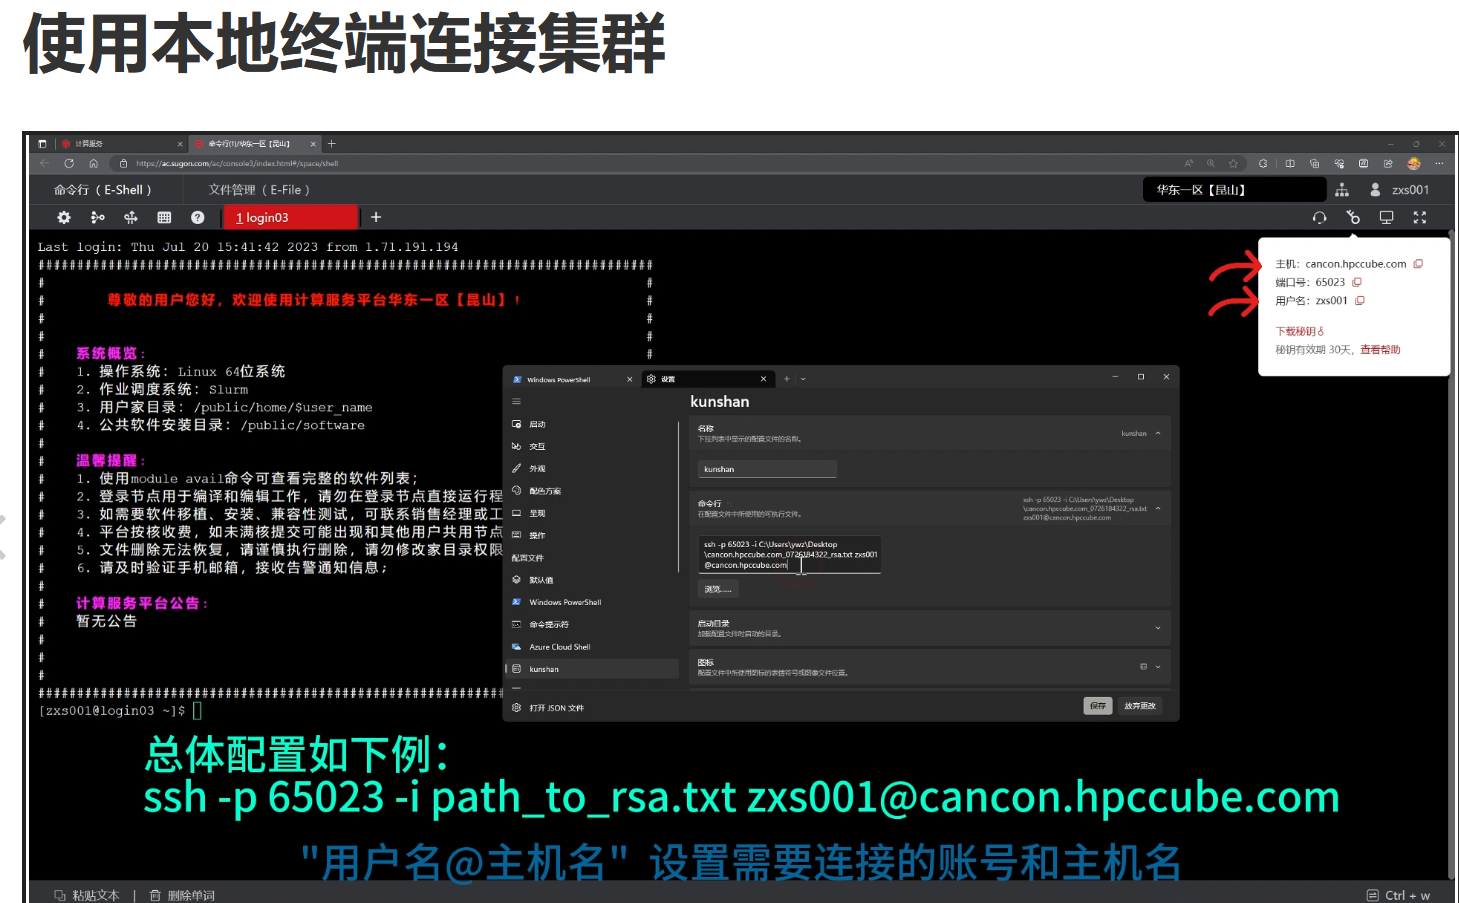
本地 ssh 连接集群
vscode remote-ssh
参考官方文档说明
下载密钥文件,记录主机名(Hostname),端口号(Portname),用户名(Username)和密钥文件所在路径。
 在 vscode remote-ssh
插件的配置文件中输入集群信息
在 vscode remote-ssh
插件的配置文件中输入集群信息 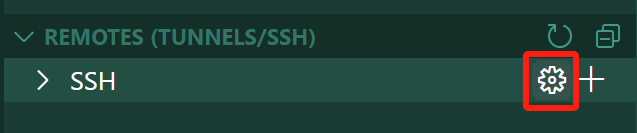
1 | Host <alias name> |
其中 <alias name> 可以自定义,会出现在 ssh
登录列表中,其他信息保持与网页端查到的一致。此时直接远程连接
ssh,窗口仍然要求输入密码,并输出问题: 1
2
3
4
5
6
7@@@@@@@@@@@@@@@@@@@@@@@@@@@@@@@@@@@@@@@@@@@@@@@@@@@@@@@@@@@
@ WARNING: UNPROTECTED PRIVATE KEY FILE! @
@@@@@@@@@@@@@@@@@@@@@@@@@@@@@@@@@@@@@@@@@@@@@@@@@@@@@@@@@@@
Permissions for 'PATH_TO_rsa.txt' are too open.
It is required that your private key files are NOT accessible by others.
This private key will be ignored.
Load key "PATH_TO_rsa.txt": bad permissionssudo chmod 600 ~/.ssh/id_rsa
修改密钥文件权限,但 windows 系统下没有对应的命令,需要手动更改权限。
右键点击密钥文件->属性->安全->高级,先选择
禁用继承
,然后删除所有主体和所有者不同的权限条目,只保留当前用户的权限,即 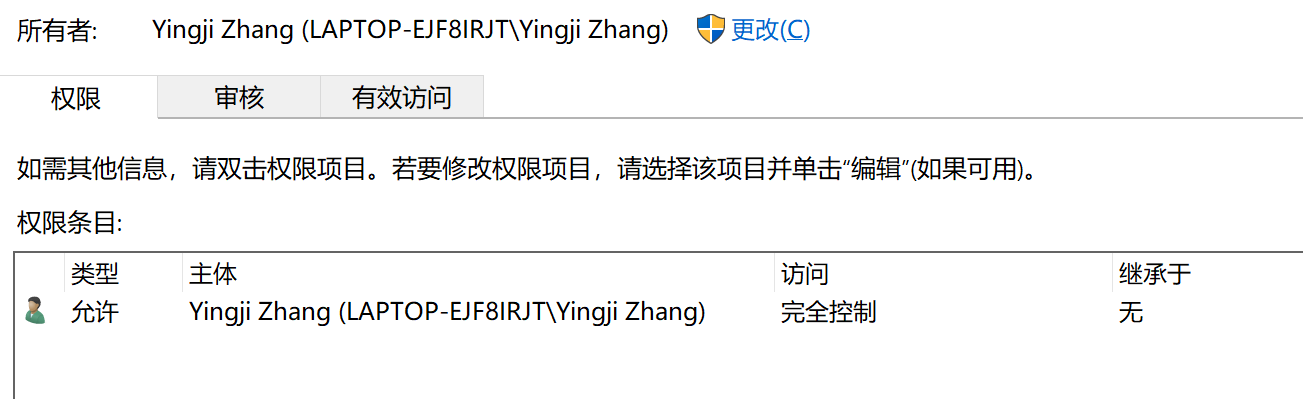 如果不确定当前用户名,可以在文件所在目录下打开本地终端,输入
echo $USERNAME 查看用户名,将密钥文件的 所有者
和权限条目的 主体 更改为正确的用户名。
保存更改并退出属性设置,重新在 vscode
中远程登录节点,不再需要输入密码,登录成功。
MobaXterm
打开 MobaXterm 窗口,选择 sessions ->
new session -> SSH
配置主机名,用户名,端口号,密钥文件 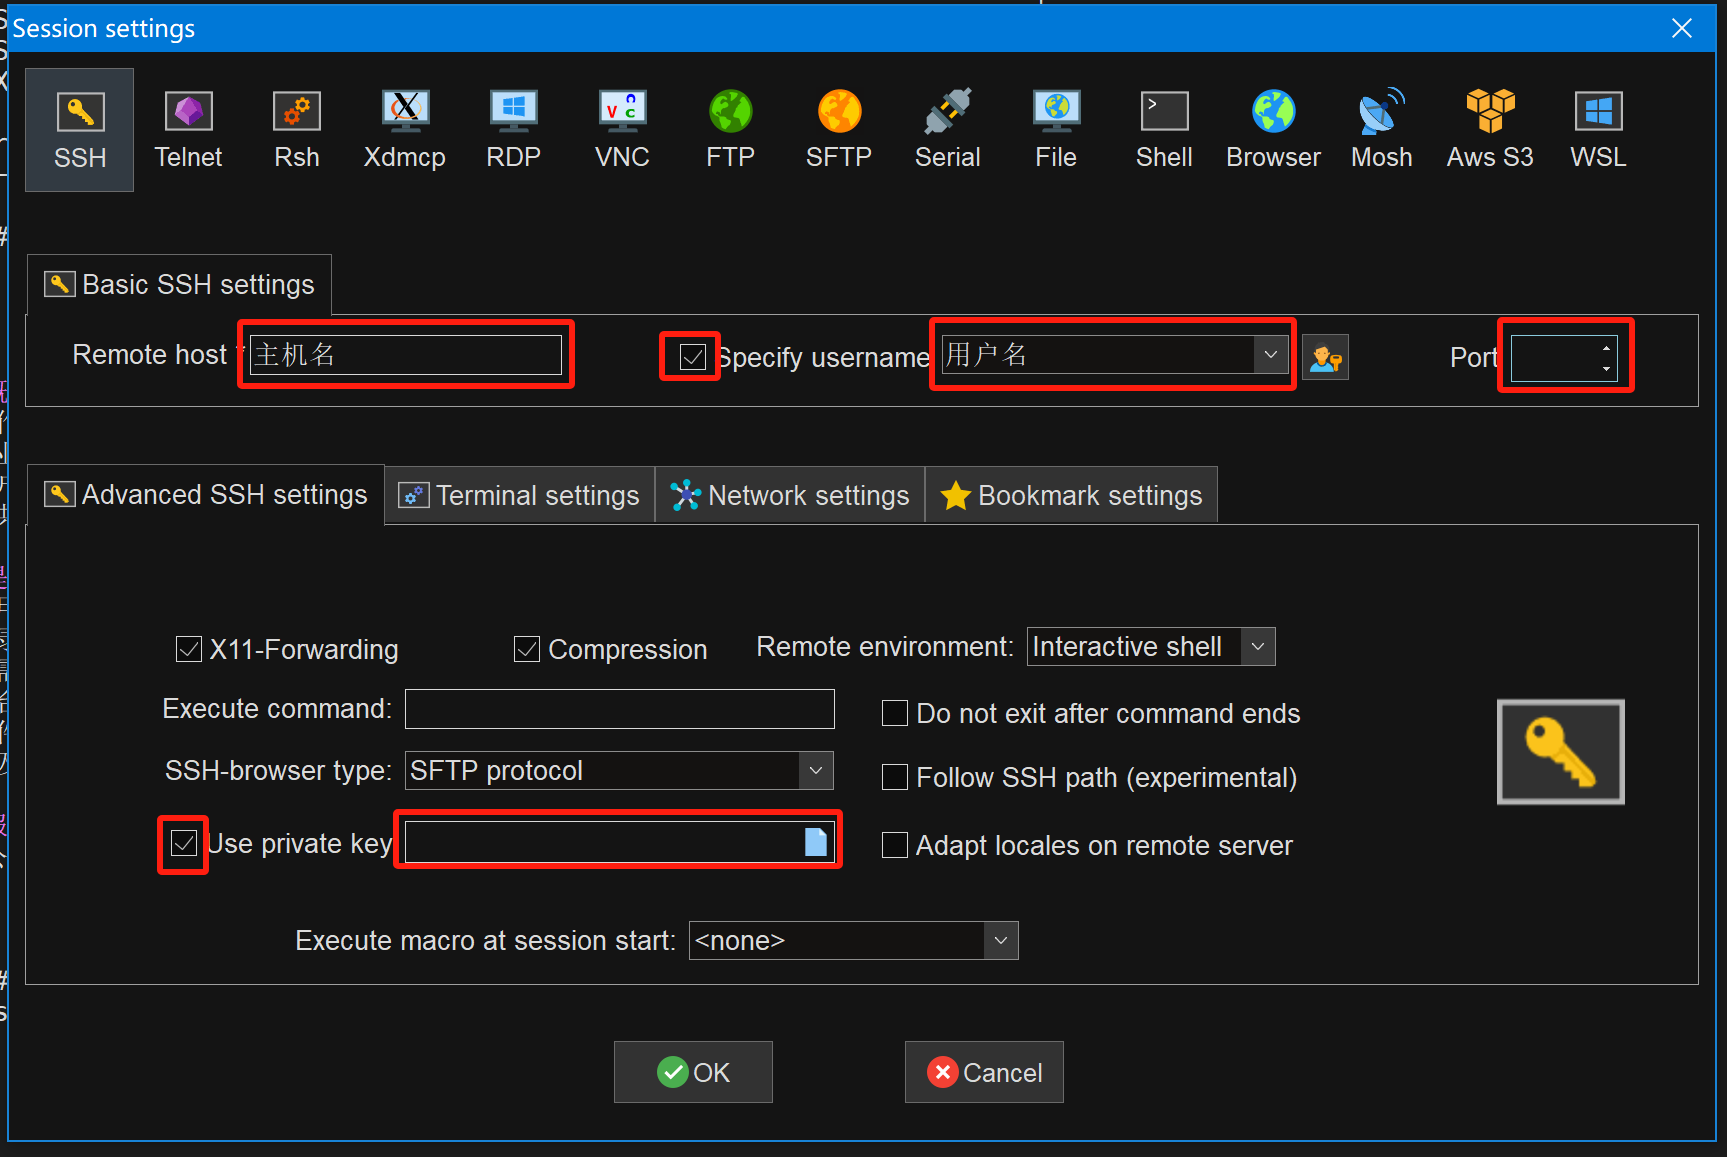 配置完成后入口会显示在
User Sessions 列表下,点击可直接登录。
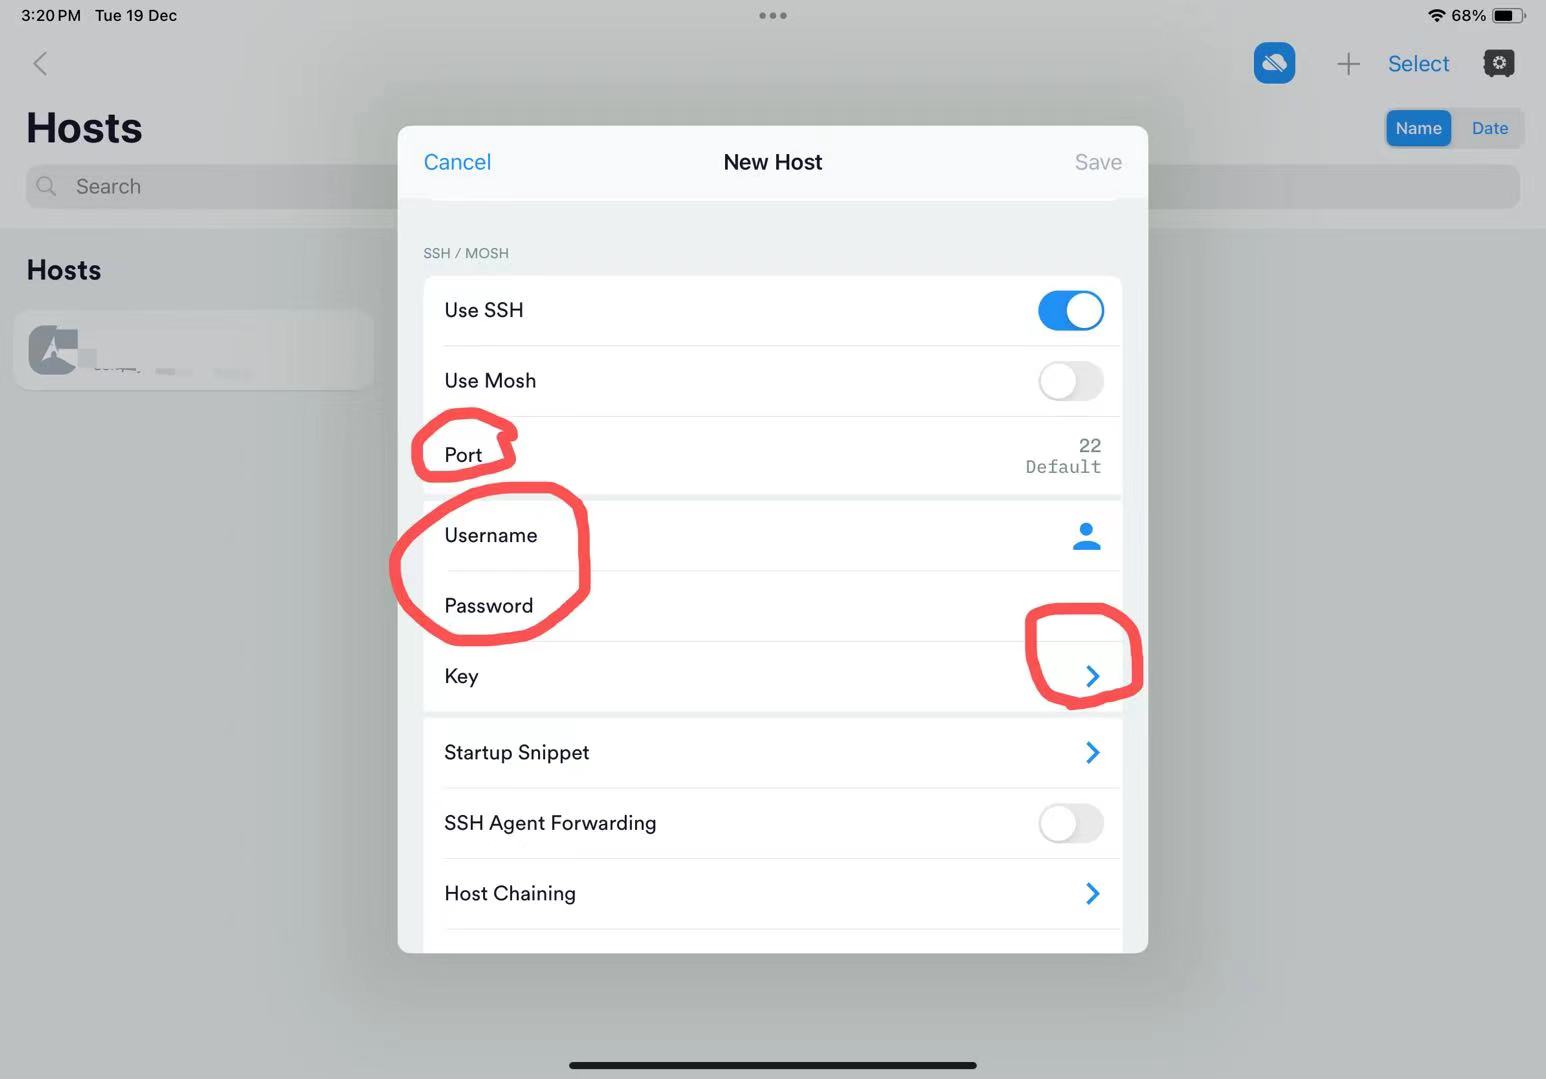
Termius
Hosts -> 右上角加号 -> New Host
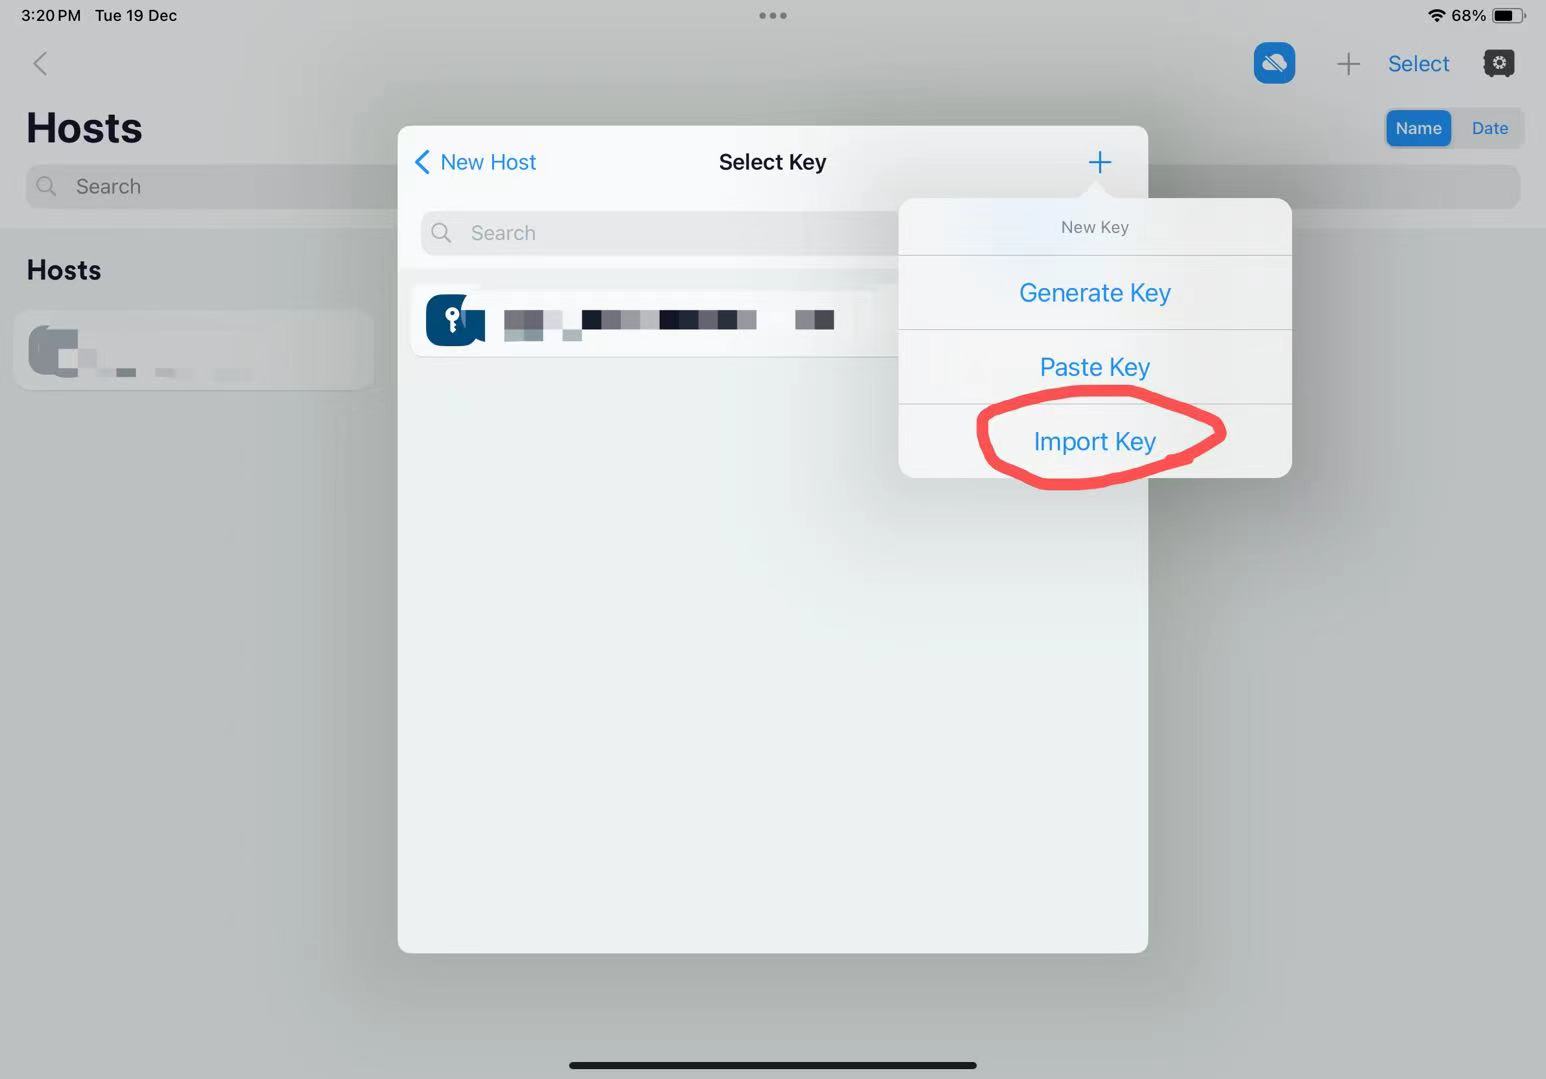
输入正确的 Hostname, Port 和 Username,点进 Key
之后在右上角加号选择 Import Key,
导入密钥文件,然后选中刚刚生成的 Key, 完成配置。 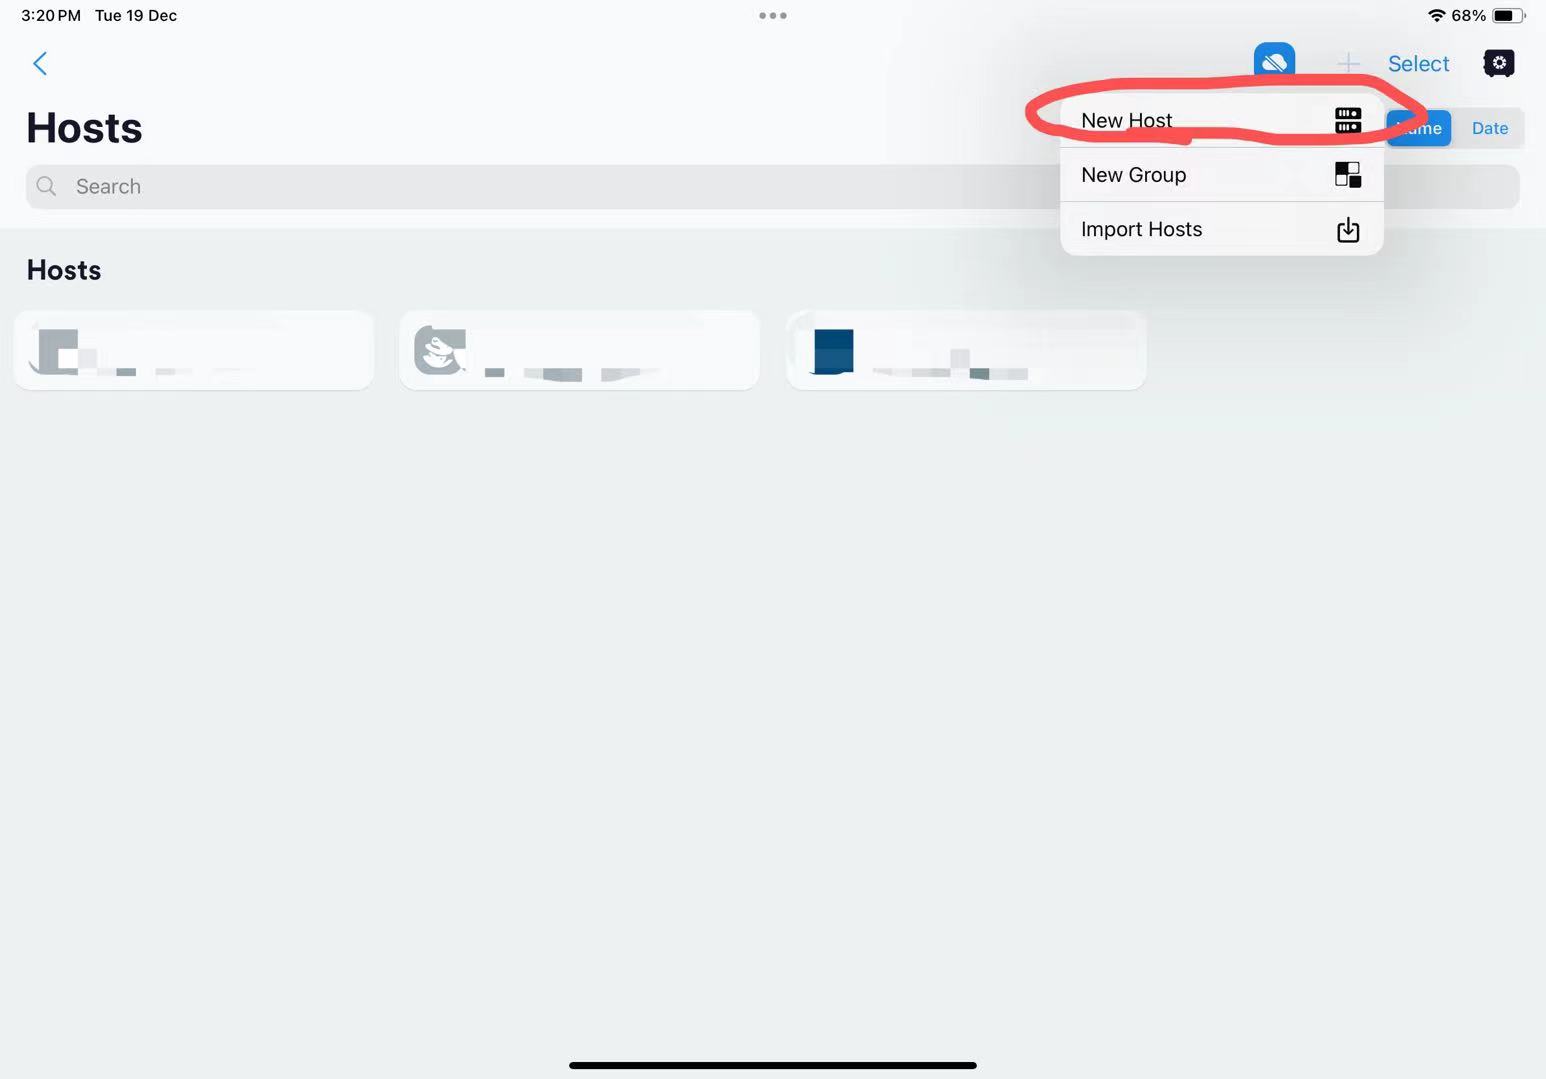
Termux
Termux 安装包需在 github 官方仓库下载,下载地址 https://github.com/termux
进入终端,执行 pkg upgrade ->
pkg install openssh ( 如果直接安装 openssh 可能出现报错
CANNOT LINK EXECUTABLE "ssh-keygen": library "libcrypto.so.3" not found: needed by main executable
,因此需要先 upgrade) 执行 ssh-keygen -t rsa
生成密钥文件,执行过程中的所有选项都回车,使用默认目录,不添加密码。
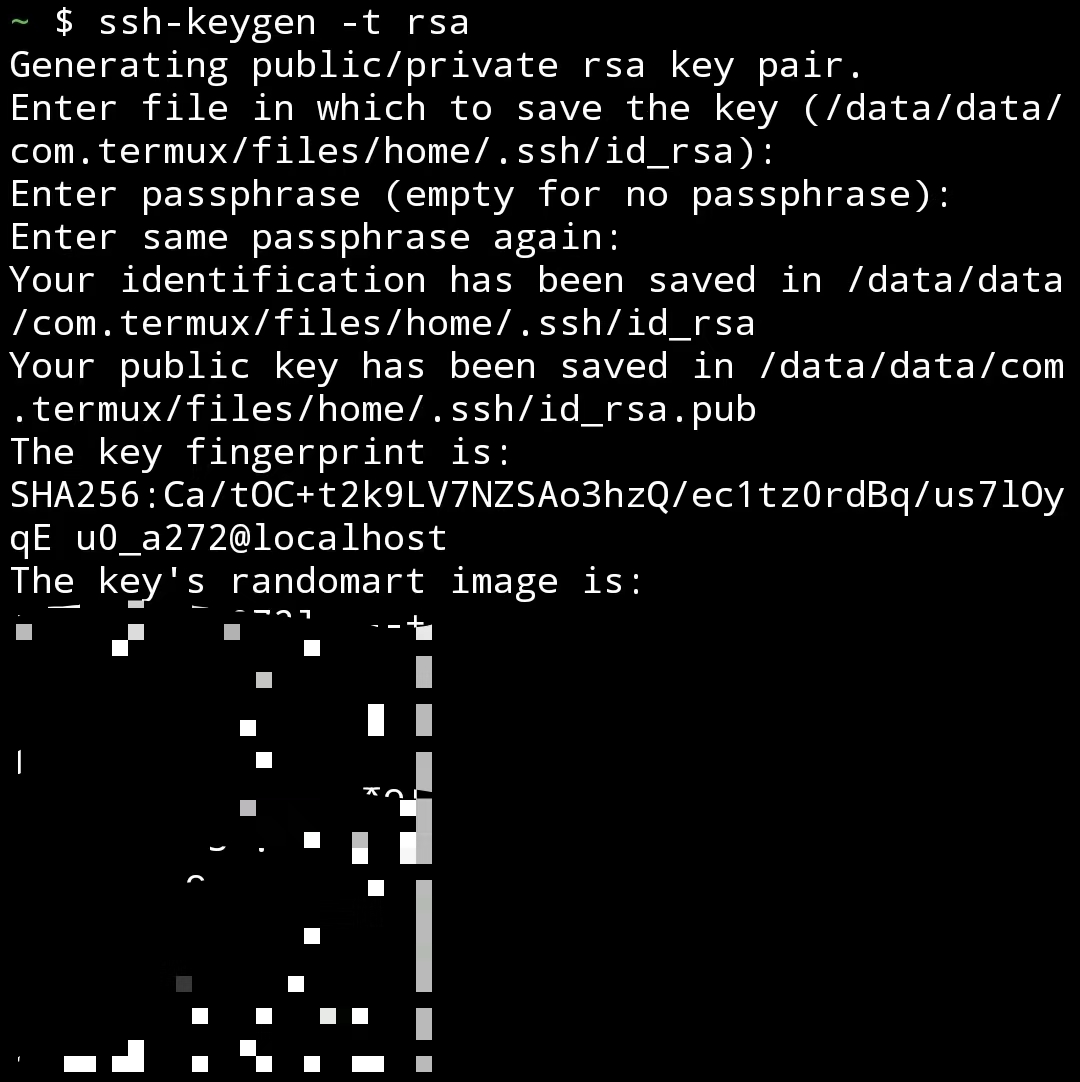
cd 到
id_rsa.pub 所在的文件夹下,打开文件,将内容复制出来。
使用其他方式登录超算,在用户目录下打开
~/.ssh/authorized_keys
文件,将复制出来的内容另起一行粘贴到此文件中,保存并退出。(不要删除或修改
authorized_keys 文件中其他内容) 在 termux 中执行
ssh -p <port> <username>@<hostname>
登录超算,过程中提示
1 | Are you shure you want to continue connecting (yes/no/[fingerprint])? |
输入 yes 回车,登录到远程超算。之后每次登录只需要输入
ssh -p <port> <username>@<hostname>
即可。登录成功后显示界面 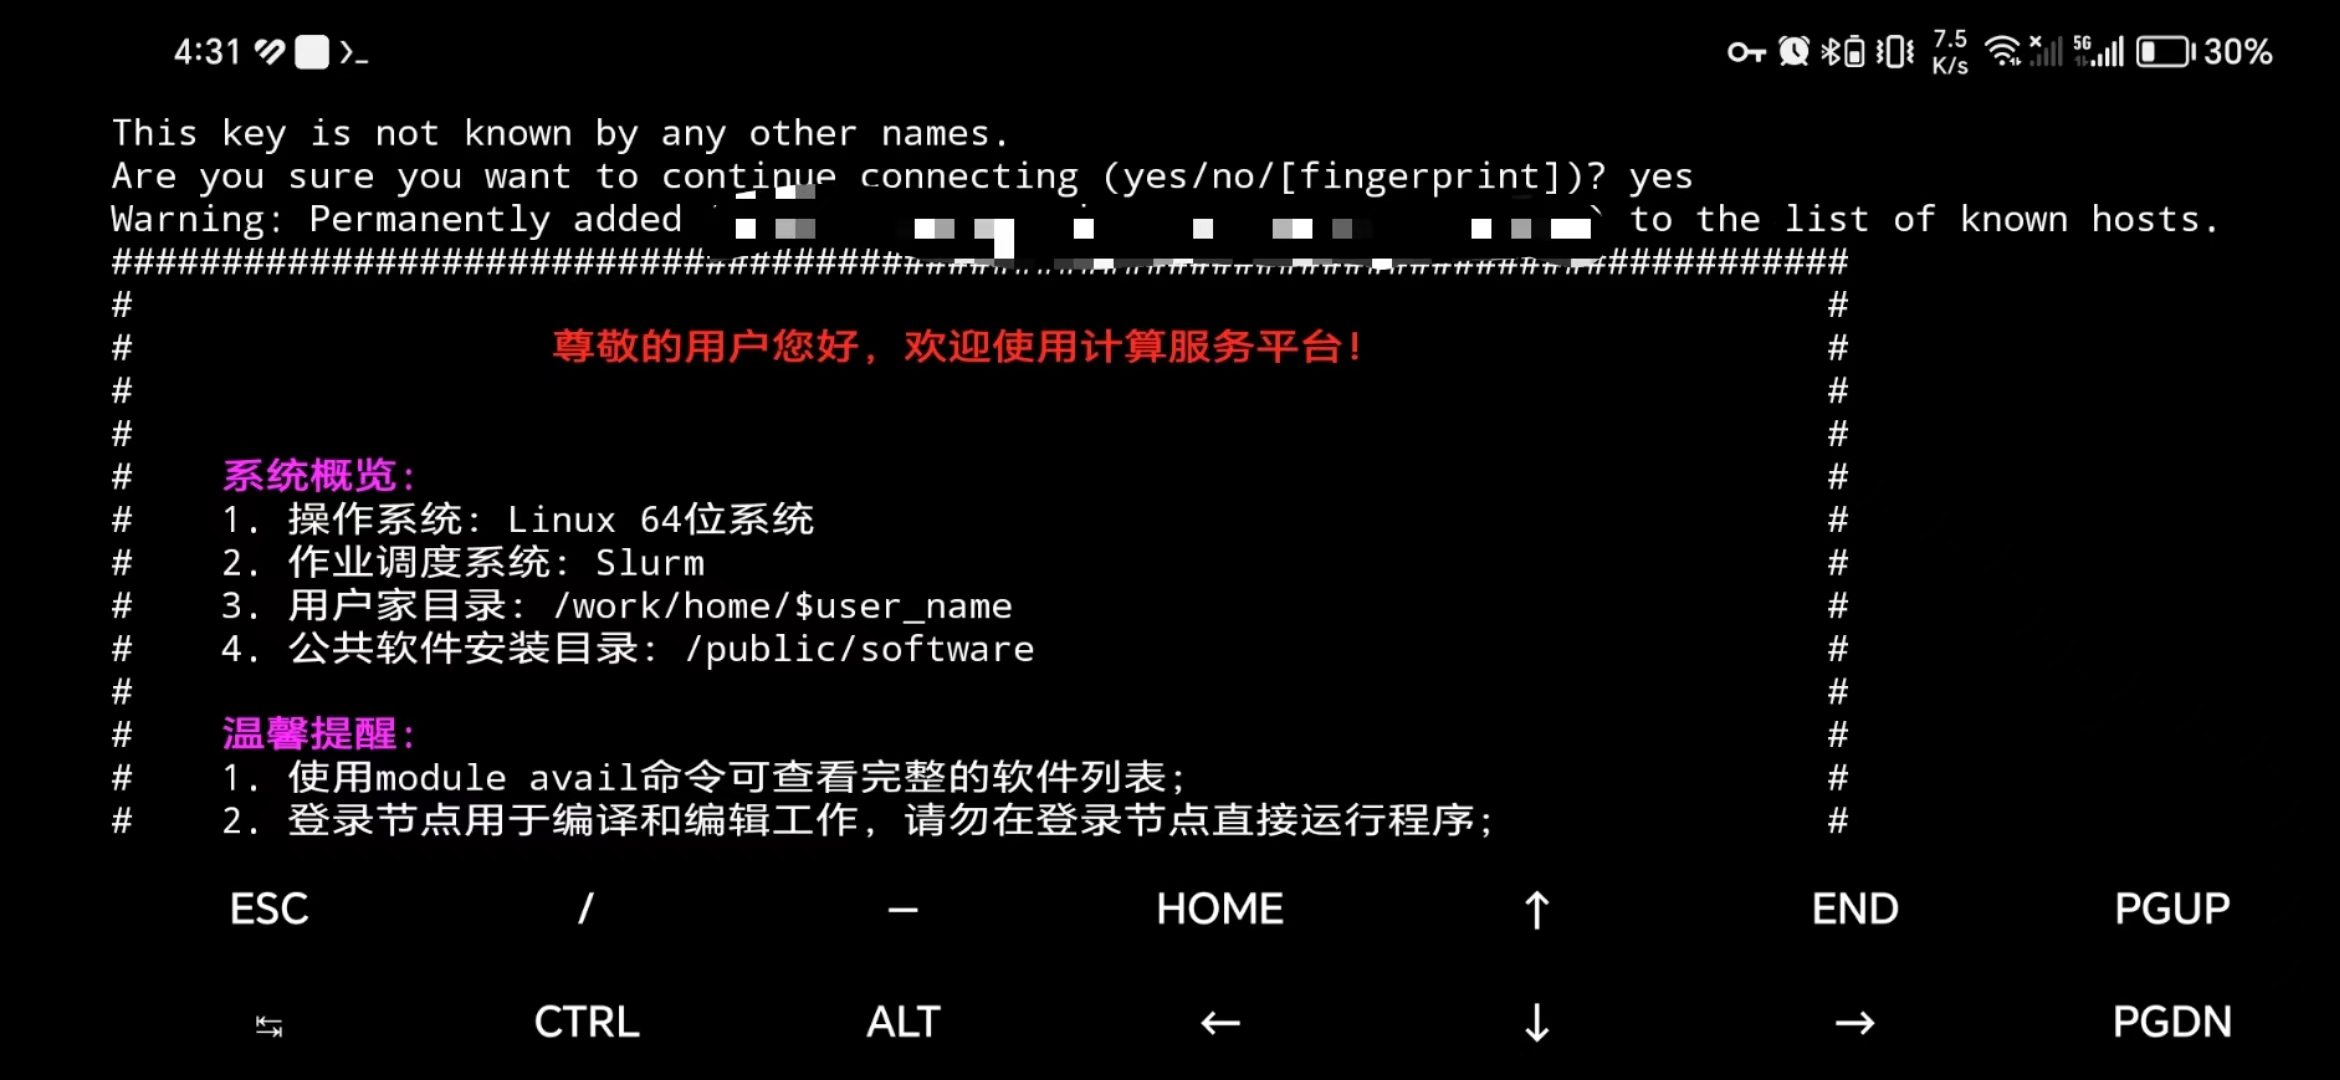
termux
放在手机后台会断开连接,需要重新连接 ssh。
映射图形桌面使用 XCrySDen
登录节点没有tk/tcl库,需要映射linux图形桌面使用xcrysden. 直接执行
xcrysden 会报错缺少依赖库: 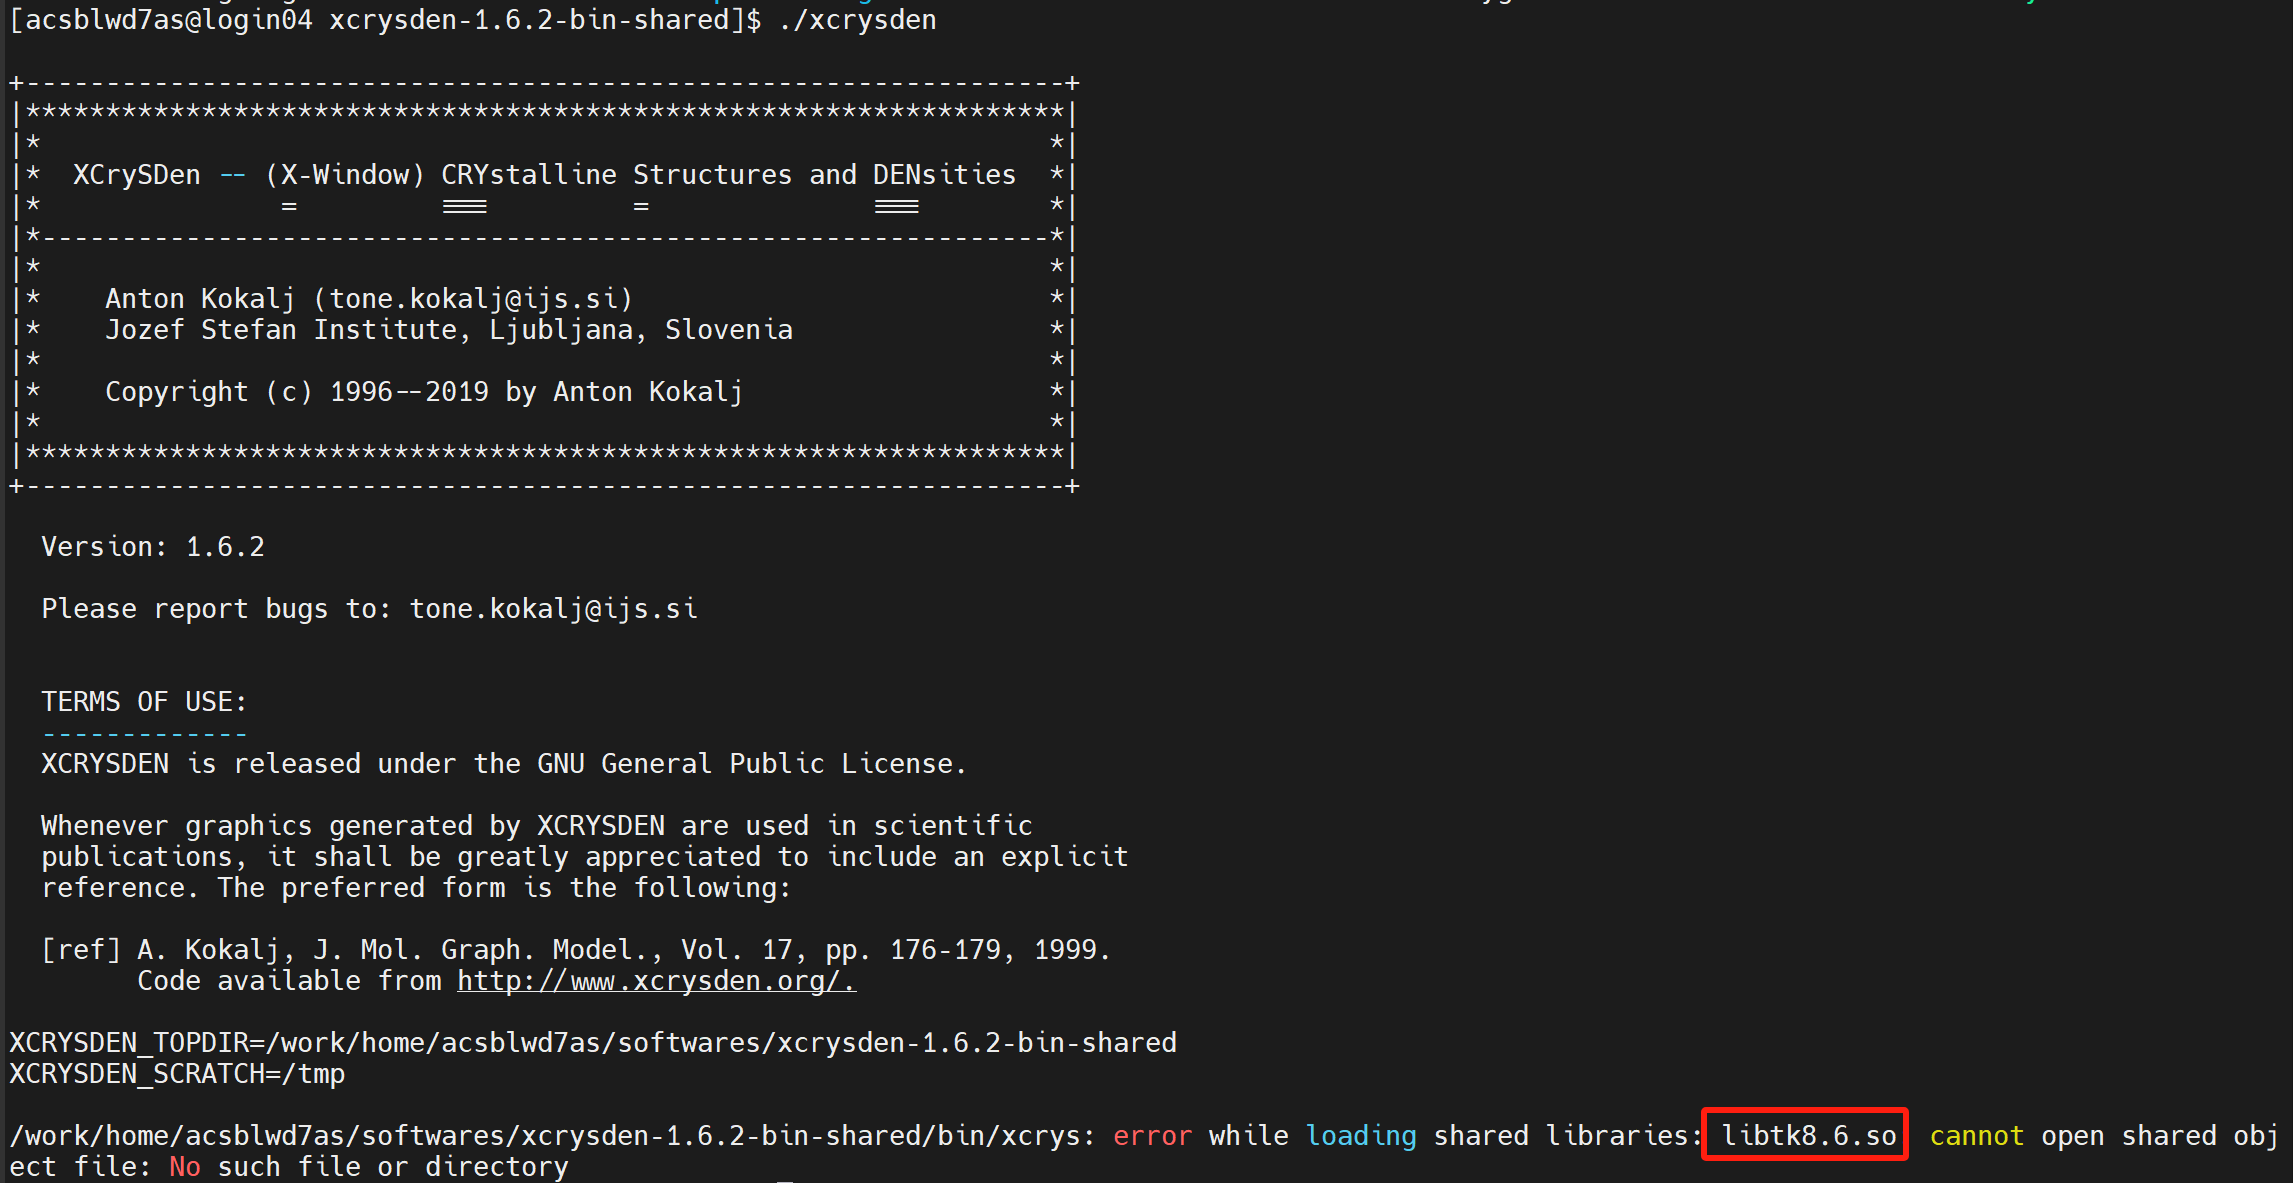 参考使用文档中可视化计算方式
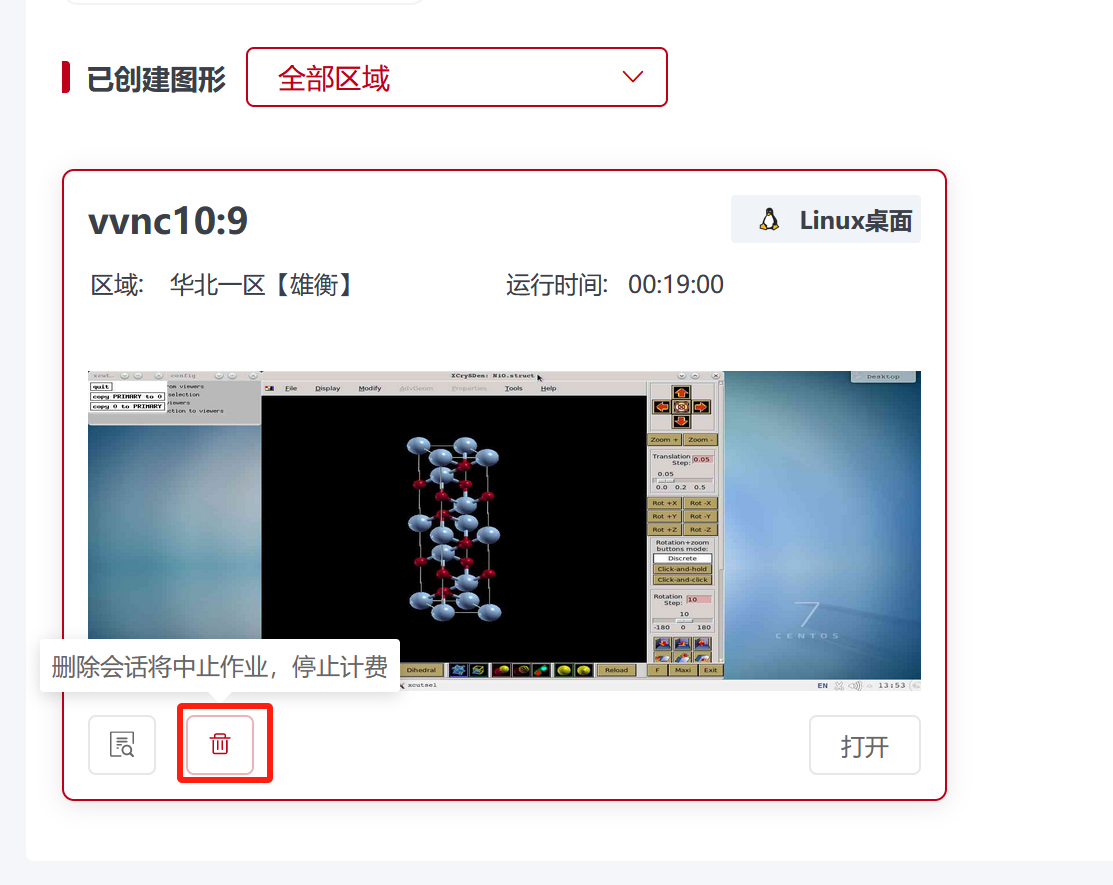
和工程师说明,需要映射图形桌面提交作业。 在网页中选择“图形桌面”
参考使用文档中可视化计算方式
和工程师说明,需要映射图形桌面提交作业。 在网页中选择“图形桌面”  我的图形->选择操作系统->选择分区->创建图形
 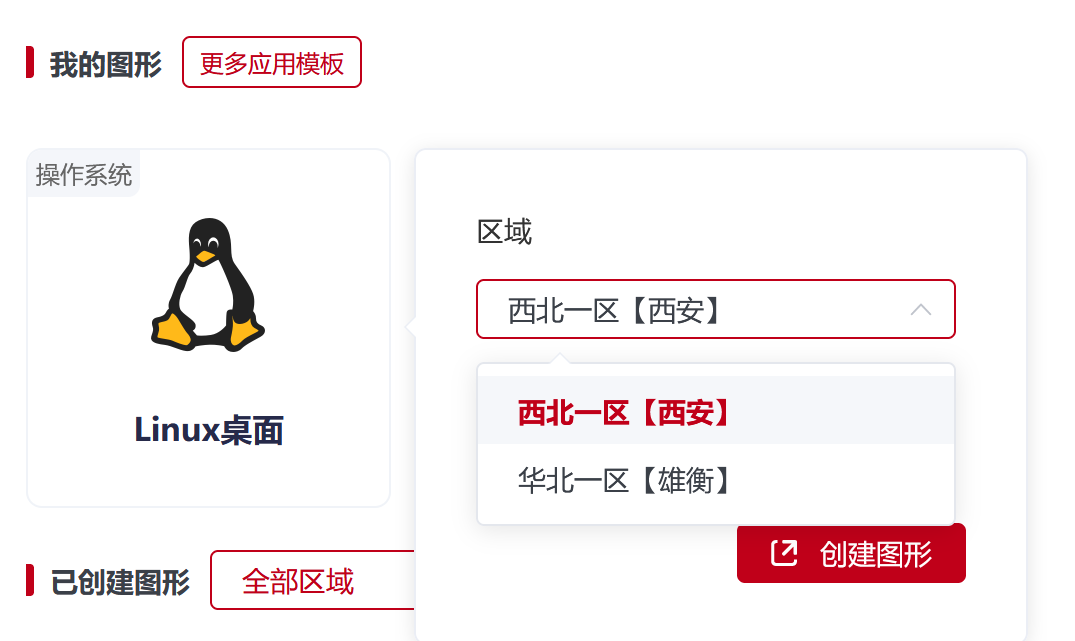 在已创建图形处查看图形窗口的 VNC
会话名称
在已创建图形处查看图形窗口的 VNC
会话名称 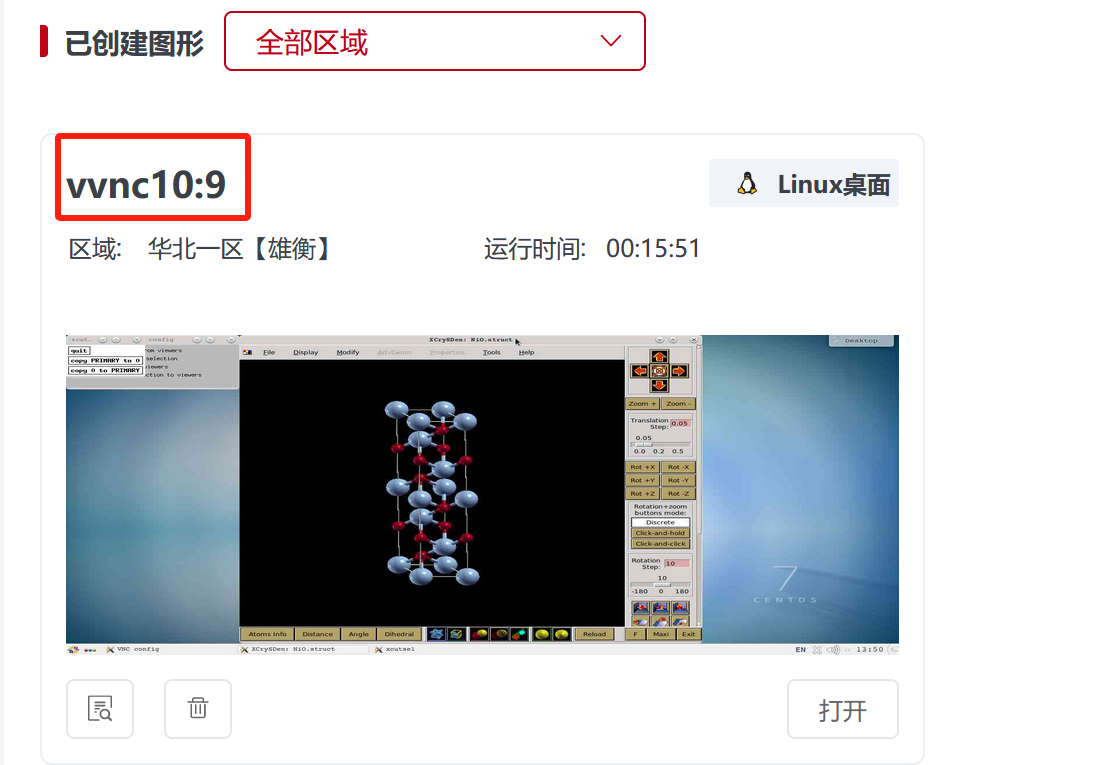
在终端的工作目录下创建 slurm 脚本,将创建的窗口vnc名称填写到变量
DISPLAY中 1
2
3
4
5
6
7
8
9
10#!/bin/bash
#SBATCH -J EDMFTF
#SBATCH -p xhacnormalb
#SBATCH -N 1
#SBATCH -n 64
source /work/home/acsblwd7as/softwares/xcrysden-1.6.2-bin-shared/env.sh
export PATH=/work/home/acsblwd7as/softwares/xcrysden-1.6.2-bin-shared:$PATH
export DISPLAY=vvnc10:9
xcrysden
使用完毕请务必删除当前图形窗口,否则将持续消耗核时。
共享目录环境依赖
安装 wien2k 和 edmft 程序时,均使用共享目录下的软件,雄衡分区
~/.bashrc 中必要的 module 如下: 1
2
3
4
5
6
7
8module load compiler/intel/2021.3.0
module load mpi/intelmpi/2021.3.0
module load compiler/gcc/9.3.0
export LD_LIBRARY_PATH=/public/software/mathlib/fftw/intelmpi/3.3.7_double/lib:$LD_LIBRARY_PATH
export LD_LIBRARY_PATH=/public/software/compiler/gcc-9.3.0/lib64:$LD_LIBRARY_PATH
export LD_LIBRARY_PATH=/public/software/mathlib/gsl/2.6/intel/lib:$LD_LIBRARY_PATH
export PATH=/public/software/mathlib/fftw/intelmpi/3.3.7_double/bin:$PATH
export PATH=/public/software/mathlib/gsl/2.6/intel/bin:$PATH1
2
3
4
5
6
7
8
9
10
11
12
13
14
15
16
17
18#!/bin/bash
#SBATCH -J dmft-test
#SBATCH -p xhacnormalb
#SBATCH -N 1
#SBATCH -n 64
#SBATCH --exclusive
export PATH=/work/home/acsblwd7as/softwares/dmft_w2k:$PATH
cd $SLURM_SUBMIT_DIR
echo "mpirun -np $SLURM_NTASKS" > mpi_prefix.dat
echo "######################start time is $(date)##########################"
run_dmft.py > output.dat 2> error.dat
echo "#####################end time is $(date)############################"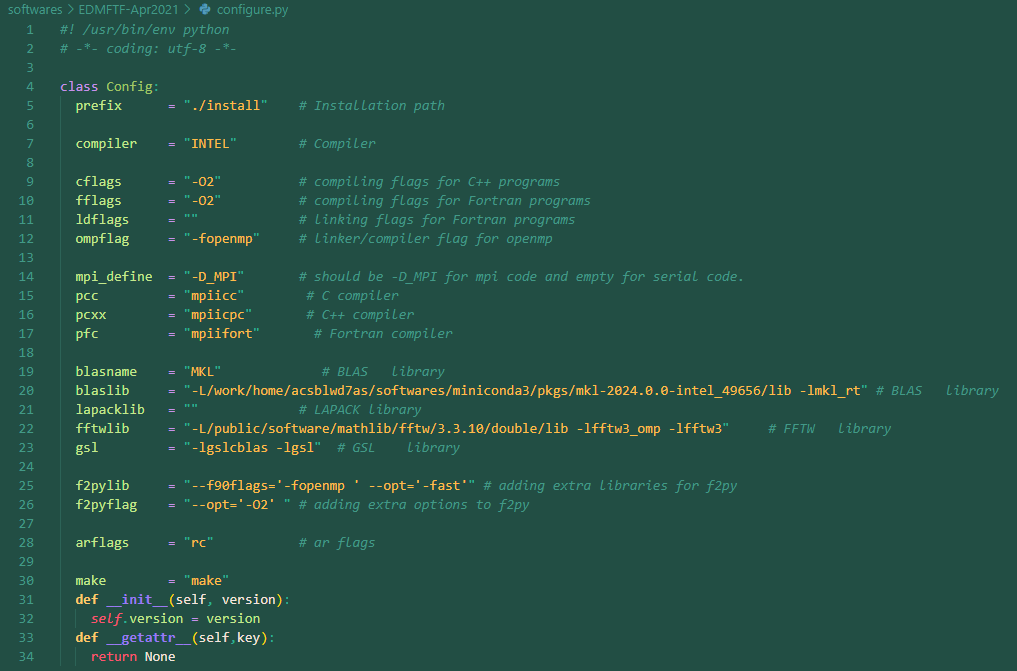 软件编译完成后,run_dmft.py
第一次运行将编译 python 程序,使用 Anaconda2-2019.10-Linux-x86_64 版本的
anaconda2/lib/python2.7 作为 python 环境。编译 weave/blitz
库时设置编译选项
软件编译完成后,run_dmft.py
第一次运行将编译 python 程序,使用 Anaconda2-2019.10-Linux-x86_64 版本的
anaconda2/lib/python2.7 作为 python 环境。编译 weave/blitz
库时设置编译选项
1 | export CC=icc |
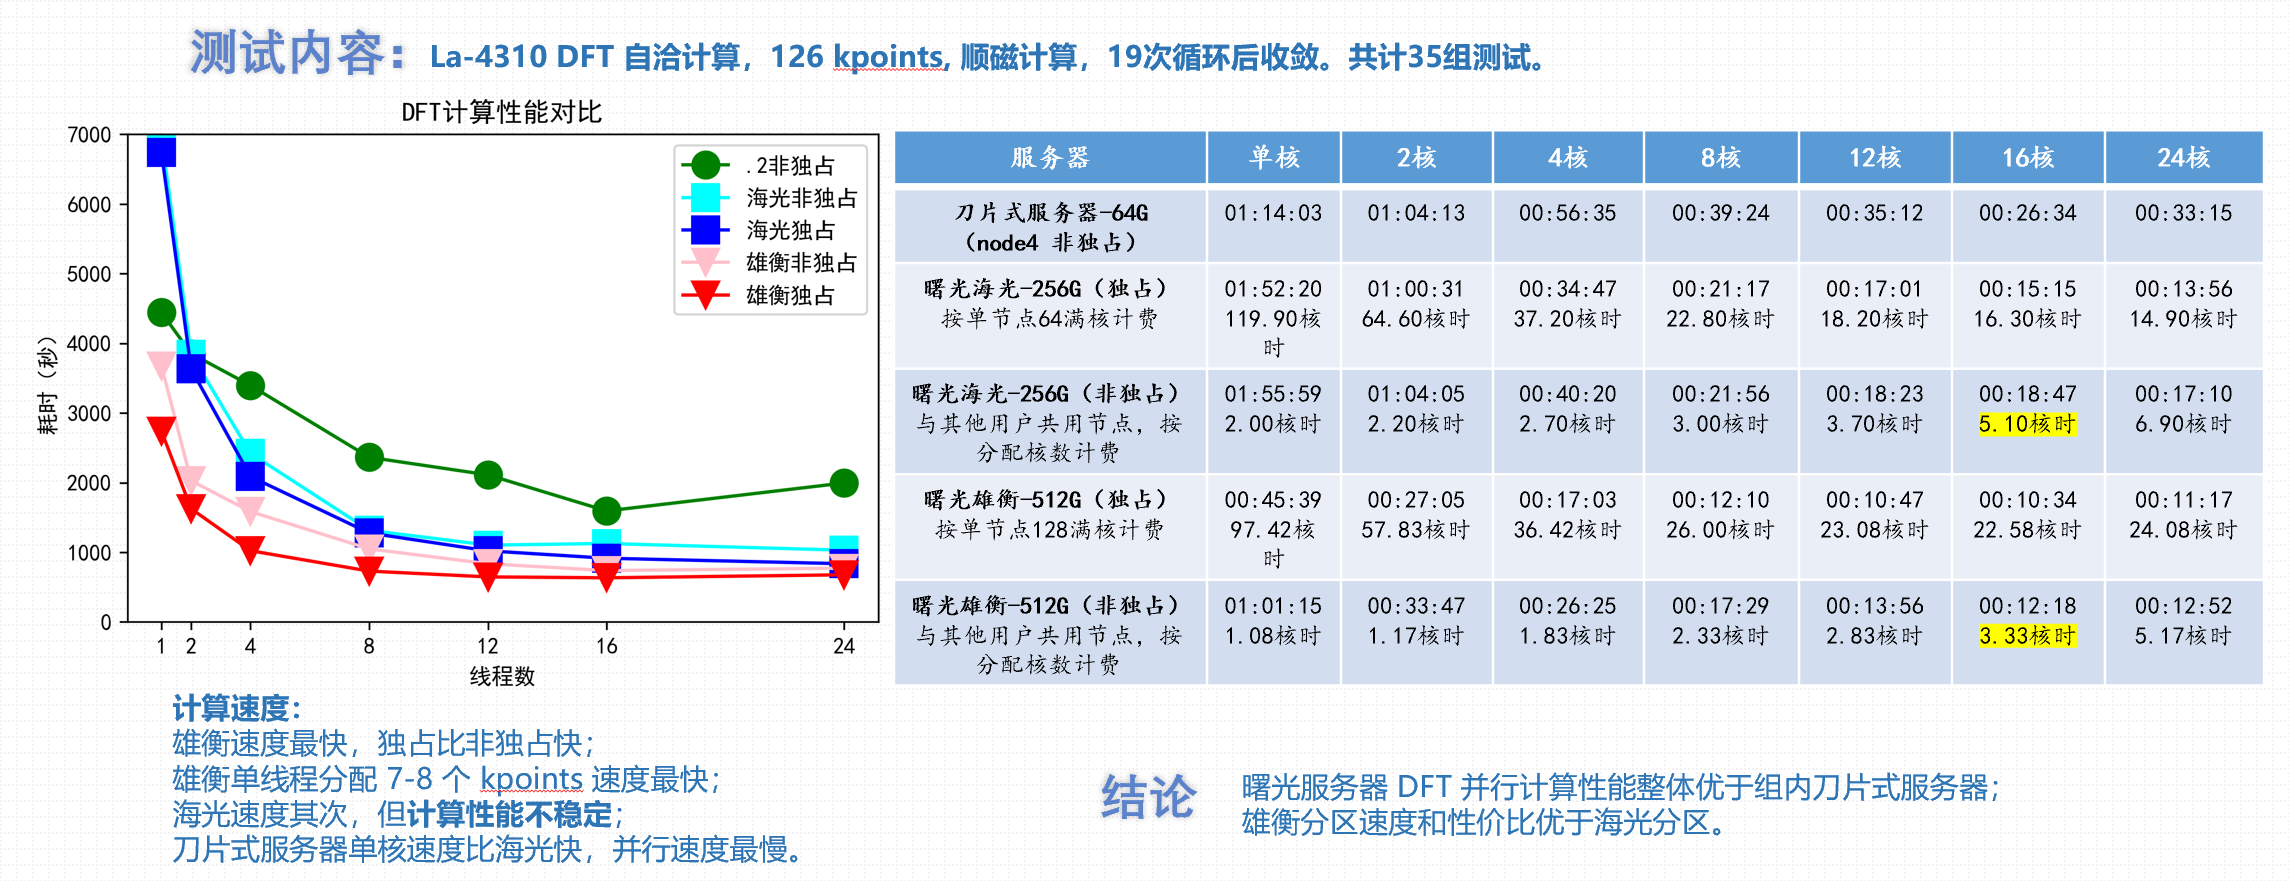
并确定库文件下带有正确的 blitz/intel/bzconfig.h 文件,否则 ctqmc 程序会在 run_dmft 自洽过程中出现 intel C++ 编译不兼容的报错。 ## mpi 并行性能测试
测试中
Wien2k 作业环境
用户目录下安装使用的版本是 wien2k_23.1,请勿与其他版本混用。 ##
脚本示例 slurm脚本: 1
2
3
4
5
6
7
8
9
10
11
12
13
14
15
16
17
18
19
20
21
22
23
24
25
26
27
28
29
30
31
32
33
34
35
36
37
38
39
40
41
42
43
44
45
46
47
48
49
50
51
52
53
54
55
56
57#!/bin/bash
#SBATCH -N 1 # Run all processes on a single node
#SBATCH -J scf
#SBATCH --ntasks=64 # Number of processes
#SBATCH -p xhacnormalb # partition
#SBATCH -c 1 # Number of processes
export OMP_NUM_THREADS=1
echo $SLURM_SUBMIT_DIR
cd $SLURM_SUBMIT_DIR
#########parallel mode is mpi/kpoint############
PARALLEL=kpoint
#yhcontrol show hostnames $SLURM_NODELIST | tee NODEFILE
srun -p xhacnormalb /bin/hostname | sort -n > NODEFILE
NODE_NUM=`cat NODEFILE | uniq | wc -l`
NP_PER_NODE=`expr $SLURM_NPROCS / $NODE_NUM`
###############creating .machines################
case $PARALLEL in
mpi)
for i in `cat NODEFILE|uniq`
do
echo "1:"$i":"$NP_PER_NODE >> .machines
done
printf "lapw0:" >> .machines
for i in `cat NODEFILE|uniq`
do
printf $i:$NP_PER_NODE" " >> .machines
done
printf "\n" >> .machines
echo "extrafine:1" >> .machines
;;
kpoint)
echo "granularity:1" > .machines
echo "#good luck ..." > .machines
for i in `cat NODEFILE|uniq`
do
for ((index=1; index<=${NP_PER_NODE}; ++index))
do
echo "1:"$i >> .machines
done
done
echo "extrafine:1" >>.machines
;;
esac
#################end creating####################
echo "##################start time is `date`####################"
run_lapw -ec 0.0001 -cc 0.0001 -fc 0.01 -p -i 100
echo "###################end time is `date`########################"
# submit: sbatch run.sh
软件编译
官方说明: > Below you find the installation
instructions:. > Move the WIEN2k-tar(.gz) file(s) into a
(new) directory (eg. WIEN2k_23) which will become your
$WIENROOT directory, uncompress the package using >
tar -xvf WIEN2k_23.2.tar (skip this if you downloaded files
separately) > gunzip *.gz >
chmod +x ./expand_lapw >
./check_minimal_software_requirements.sh > This will
check Linux for necessary and optional software like: tcsh, fortran
compiler, fftw, .... If the required software cannot be found on
your system, it does not make sense to continue with the installation.
You MUST install the missing software components. (Missing
optional software products may disable a few features of WIEN2k, but all
important parts of WIEN2k can still run). >
./expand_lapw > This will expand all files and copies
various shell-scripts. In $WIENROOT/SRC you find the postscript and pdf
versions of the usersguide (260 pages). Proceed with reading chapter
"Installation". New users can then configure and compile WIEN using:
> ./siteconfig_lapw > If you want to update from a
previous (recent) WIEN2k version you can greatly simplify the
installation using a previous WIEN2k-directory. It will read the
configuration from the corresponding WIEN2k_* files and all you need to
do is recompile all programs: > ./siteconfig_lapw -update
prev_wien2k_dir > After successfull installation, every user should
run: > ./userconfig_lapw > which set's up the proper
environment for WIEN (when you update from a previous version, just edit
.bashrc/.cshrc and change the WIENROOT variable). Continue with chapter
"Quick start" in the usersguide.

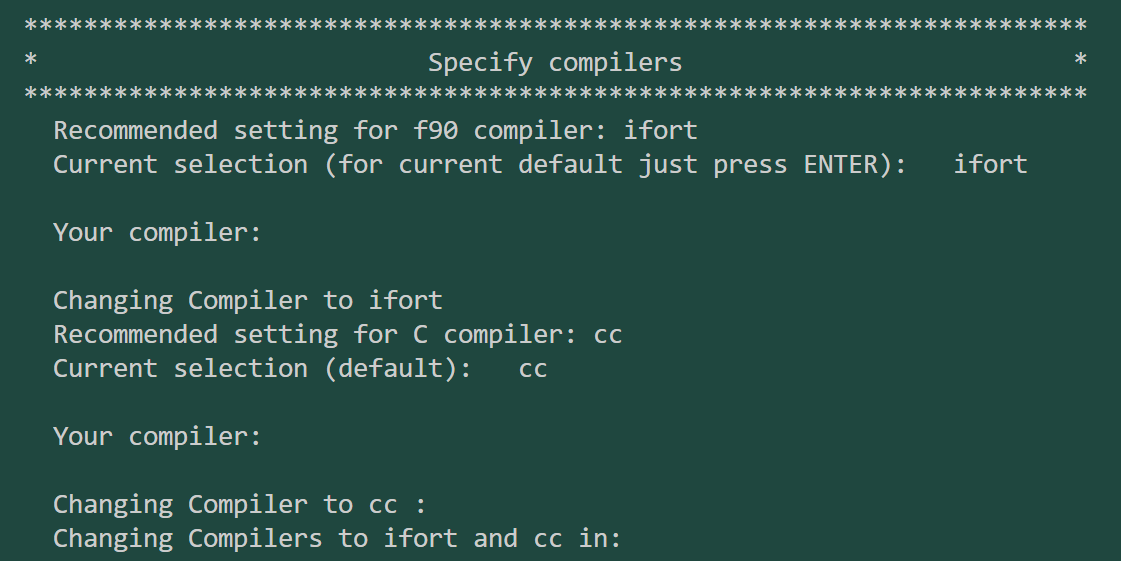
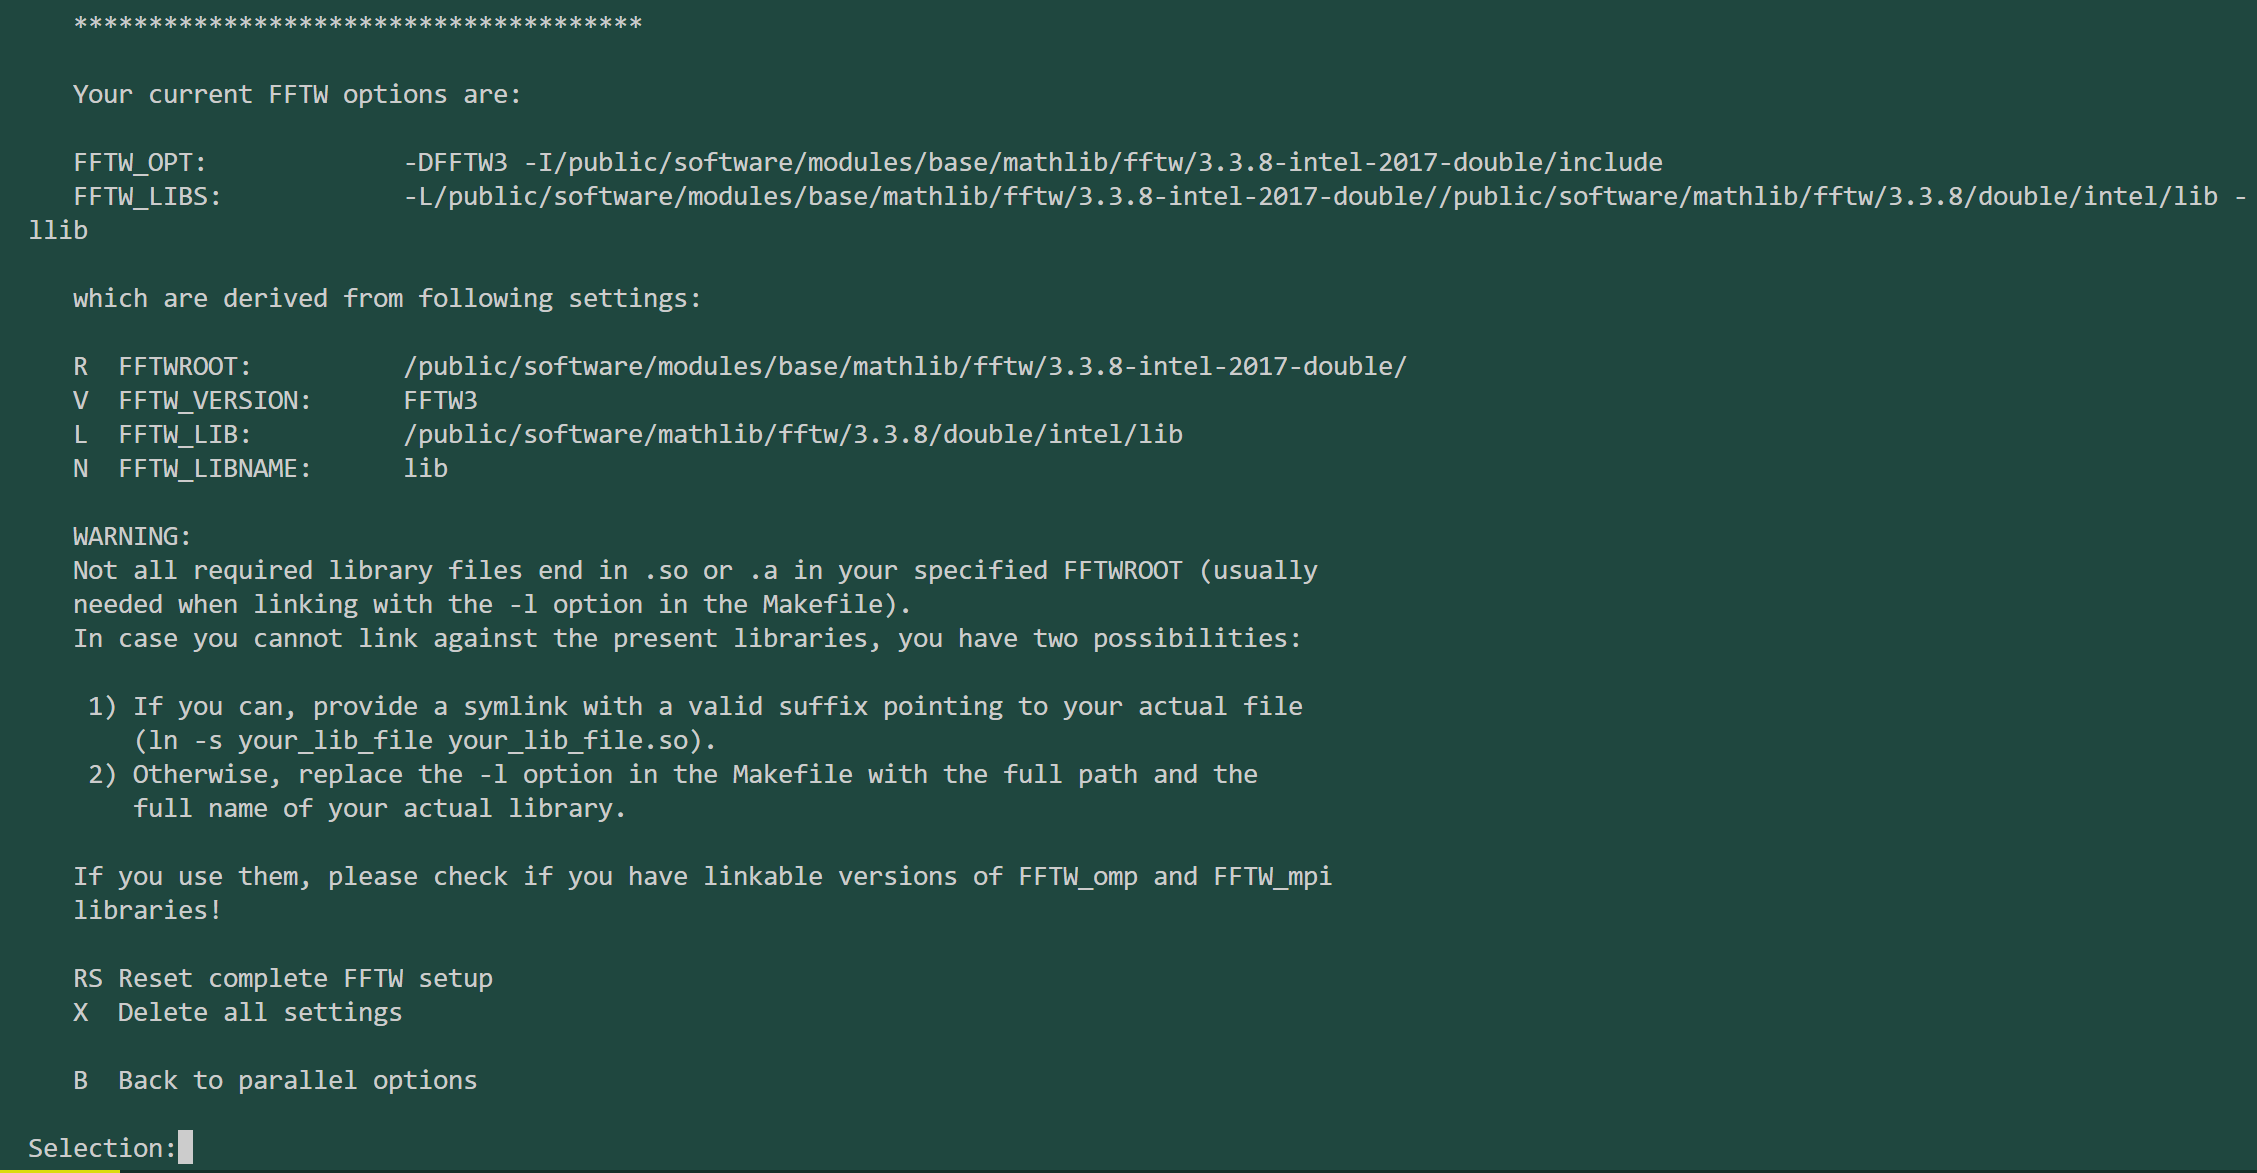
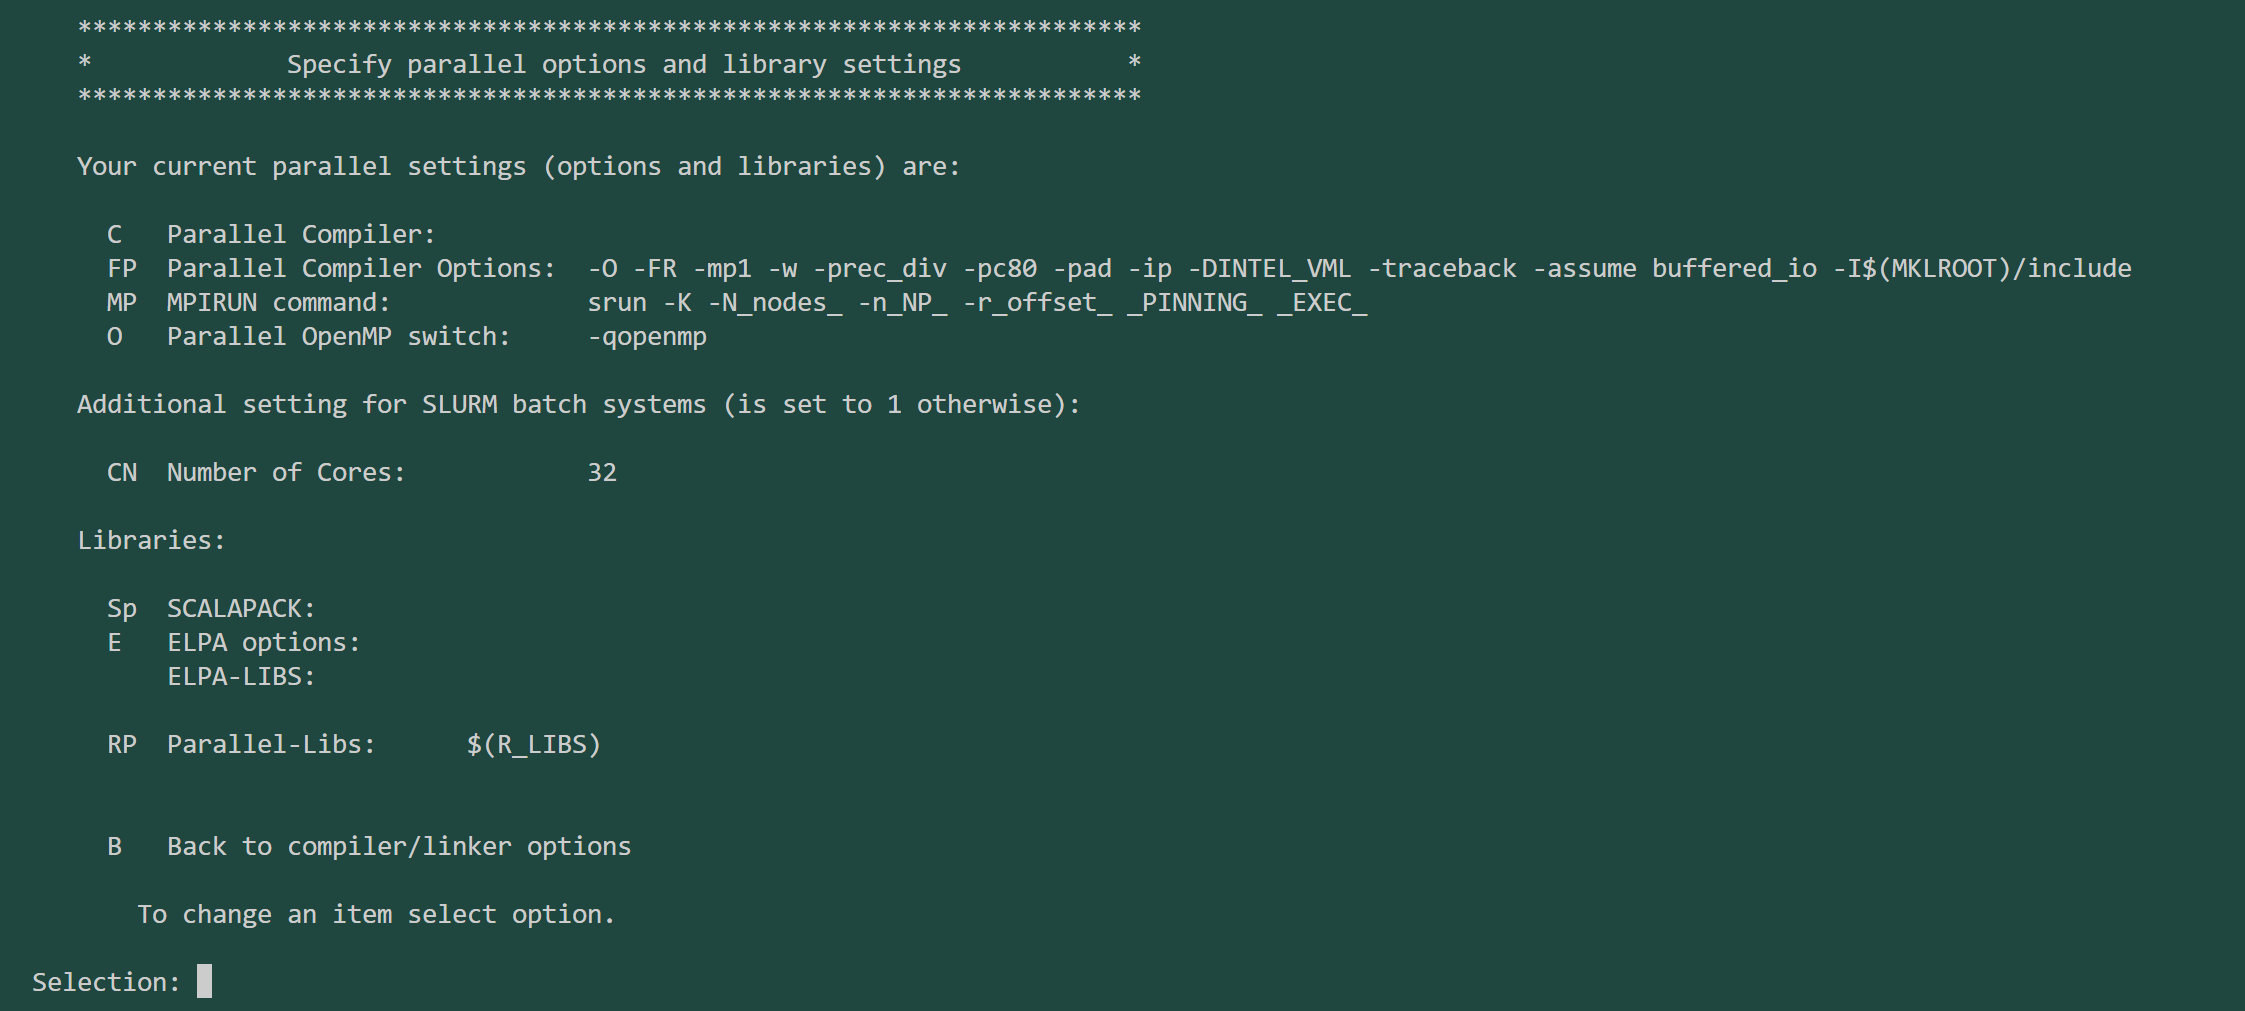 更改 fftw 配置
 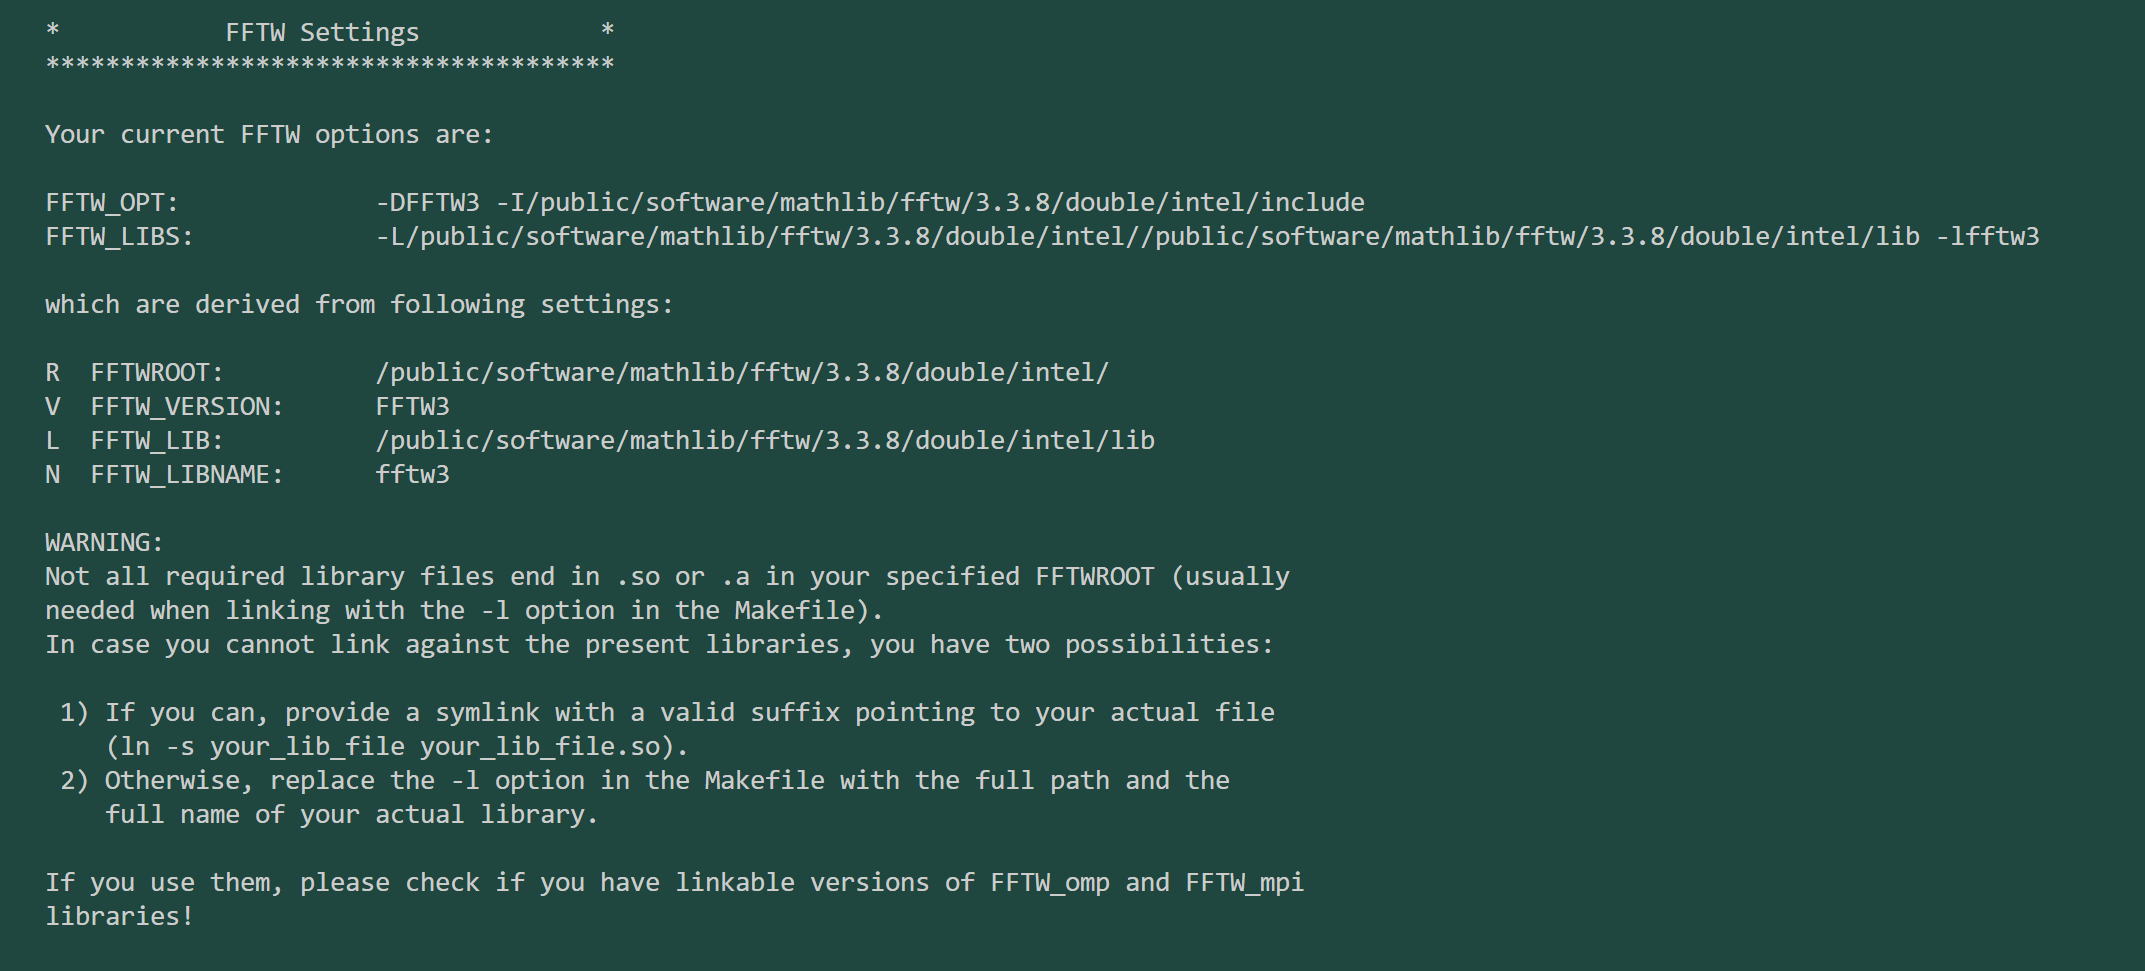 等待编译,编译结束后出现
 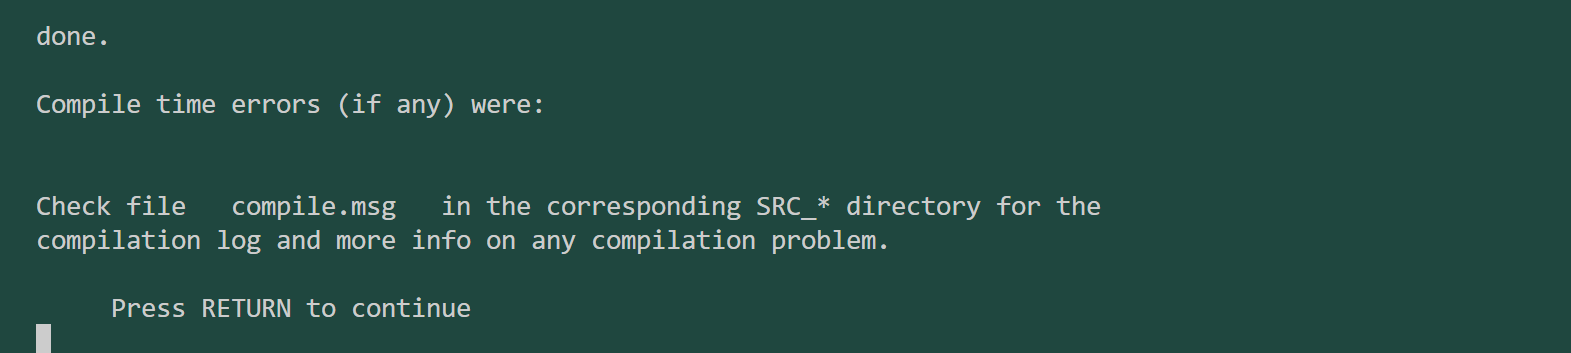 执行
执行 ./userconfig_lapw
将 wien2k 相关路径添加到环境变量文件中,重新加载(source
或重启终端)之后完成配置。 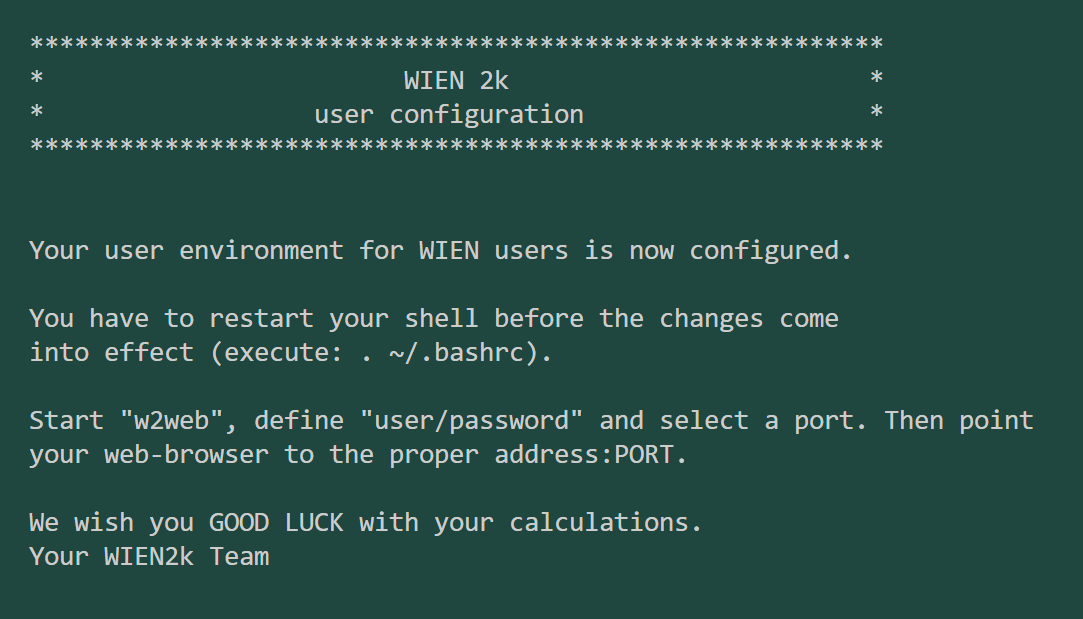
k points parallel 并行性能测试
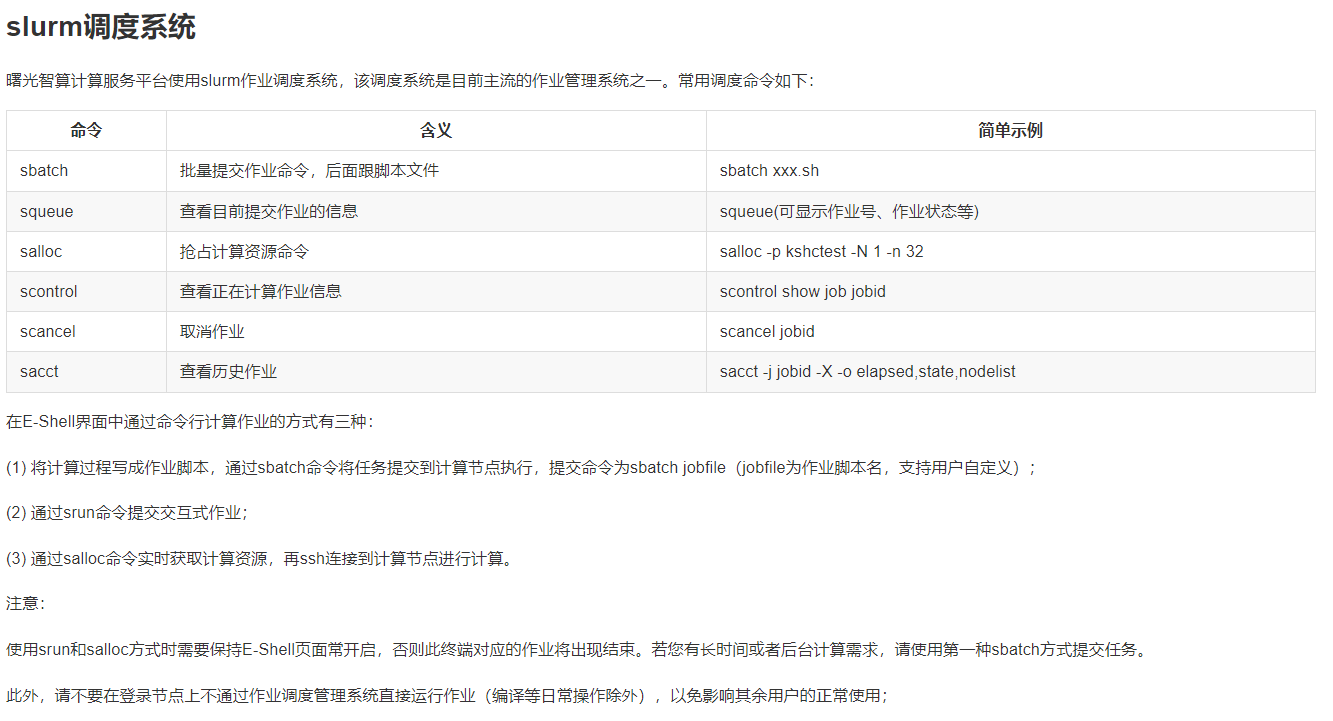
附录:SLURM 作业调度系统
参考资料
曙光超算用户手册 EDMFT安装说明 wien2k_23.1用户手册 Blitz++源文件 Blitz++用户手册 scipy.weave 手册 C/C++联合编译的讨论 complex.h 在 intel/gnu 中编译不兼容的讨论 在 numpy/sidtutils 库中调用 intel compiler 的讨论 如何在 configure 后正确设置 compile linker 的讨论 intel/bzconfig.h 文件被错误编译为 gnu/bzconfig.h 的讨论 How can i get an bzconfig.h file for intel c++ compiler? 的讨论 sci-weave 发行版(0.17.0 和 0.18.0 是较为稳定的 weave安装包) 使用 setup.py 编译 python 库时的 unknwon distribution option 问题讨论